How to build a diy garden shed with a classic a-frame roof

Alright, folks, let's talk sheds! You know that feeling: you've got tools spilling out of the garage, seeds taking over the kitchen counter, and your gardening dreams are getting buried under a mountain of clutter. Sounds familiar? Well, fear no more! Today, we're gonna dive into building your very own A-frame shed, and let me tell you, it's way more doable than you might think.
Planning is Key
First things first, let's get our ducks in a row. Grab your trusty notebook, a cup of coffee (or tea, if you're fancy), and let's get down to business.
Size and Shape: This is the foundation of your shed. Measure your available space, decide on the desired size (don't go overboard!), and sketch out a rough plan. An A-frame shed can be a charming addition to your garden.
Materials: We're talking wood, folks! Decide on the type you want - pressure-treated for longevity, cedar for natural beauty, or even reclaimed wood for a rustic vibe. And don't forget the roof - shingles, metal, or even a green roof are all options!
Foundation: You can go with a simple concrete slab, a gravel base, or even sturdy wooden blocks. Just make sure it's level and can handle the weight of your shed.
Building Permits: Check with your local building department. They might have specific requirements for shed construction, so it's better to be safe than sorry.
Let's Get Building!
Now comes the fun part: the actual construction. We'll break it down into manageable steps:
1. The Foundation: Prepare your chosen foundation. This might mean pouring concrete, laying down gravel, or leveling wooden blocks. Make sure it's level and strong enough to support the weight of your shed.
2. Building the Floor: Using your chosen wood, construct the floor frame. You'll need to create a rectangular perimeter with sturdy beams, and then fill in the inside with joists. Remember to leave an opening for your door!
3. Walls Are Up: Now we're talking! Start by cutting your wall studs to the desired height. You'll need to cut the bottom of the studs at a slight angle to meet the slanted roof line. Attach the studs to the floor frame, creating the walls of your shed.
4. The Roof: Here's where the "A" in A-frame comes in. The roof will require slightly more precision. You'll need to cut the rafters at the correct angle to create the triangular shape. You'll also need a ridge board at the top to join the rafters together. Don't forget to use bracing for stability.
5. Roofing Time: Now for the finishing touches. Attach your chosen roofing material - shingles, metal, or even a green roof.
6. Finishing Touches: This is where you can really personalize your shed. Add doors and windows, paint it your favorite color, and maybe even add some decorative trim.
Tips and Tricks from the Pro
Safety First: Always use safety goggles, gloves, and appropriate footwear when working with power tools and wood.
Measure Twice, Cut Once: Don't rush! A little extra precision in your cuts can save you headaches later.
Use a Level: Leveling your foundation and walls is key to a sturdy and aesthetically pleasing shed.
Don't be Afraid to Ask for Help: If you're not confident with certain steps, don't hesitate to ask a friend, family member, or even a local handyman for assistance.
Your Own Piece of Garden Paradise
And there you have it, folks! Your very own DIY A-frame garden shed, ready to house your tools, seeds, and all your gardening dreams. Remember, it doesn't have to be perfect - a bit of character only adds to its charm. So grab your tools, put on your favorite playlist, and have fun building your dream shed!
Bonus Tip: Consider adding a little skylight to your roof. It'll provide some natural light and make your shed feel even more spacious.
So, what are you waiting for? Let's get building!
How to build a 10x12 garden shed for beginners
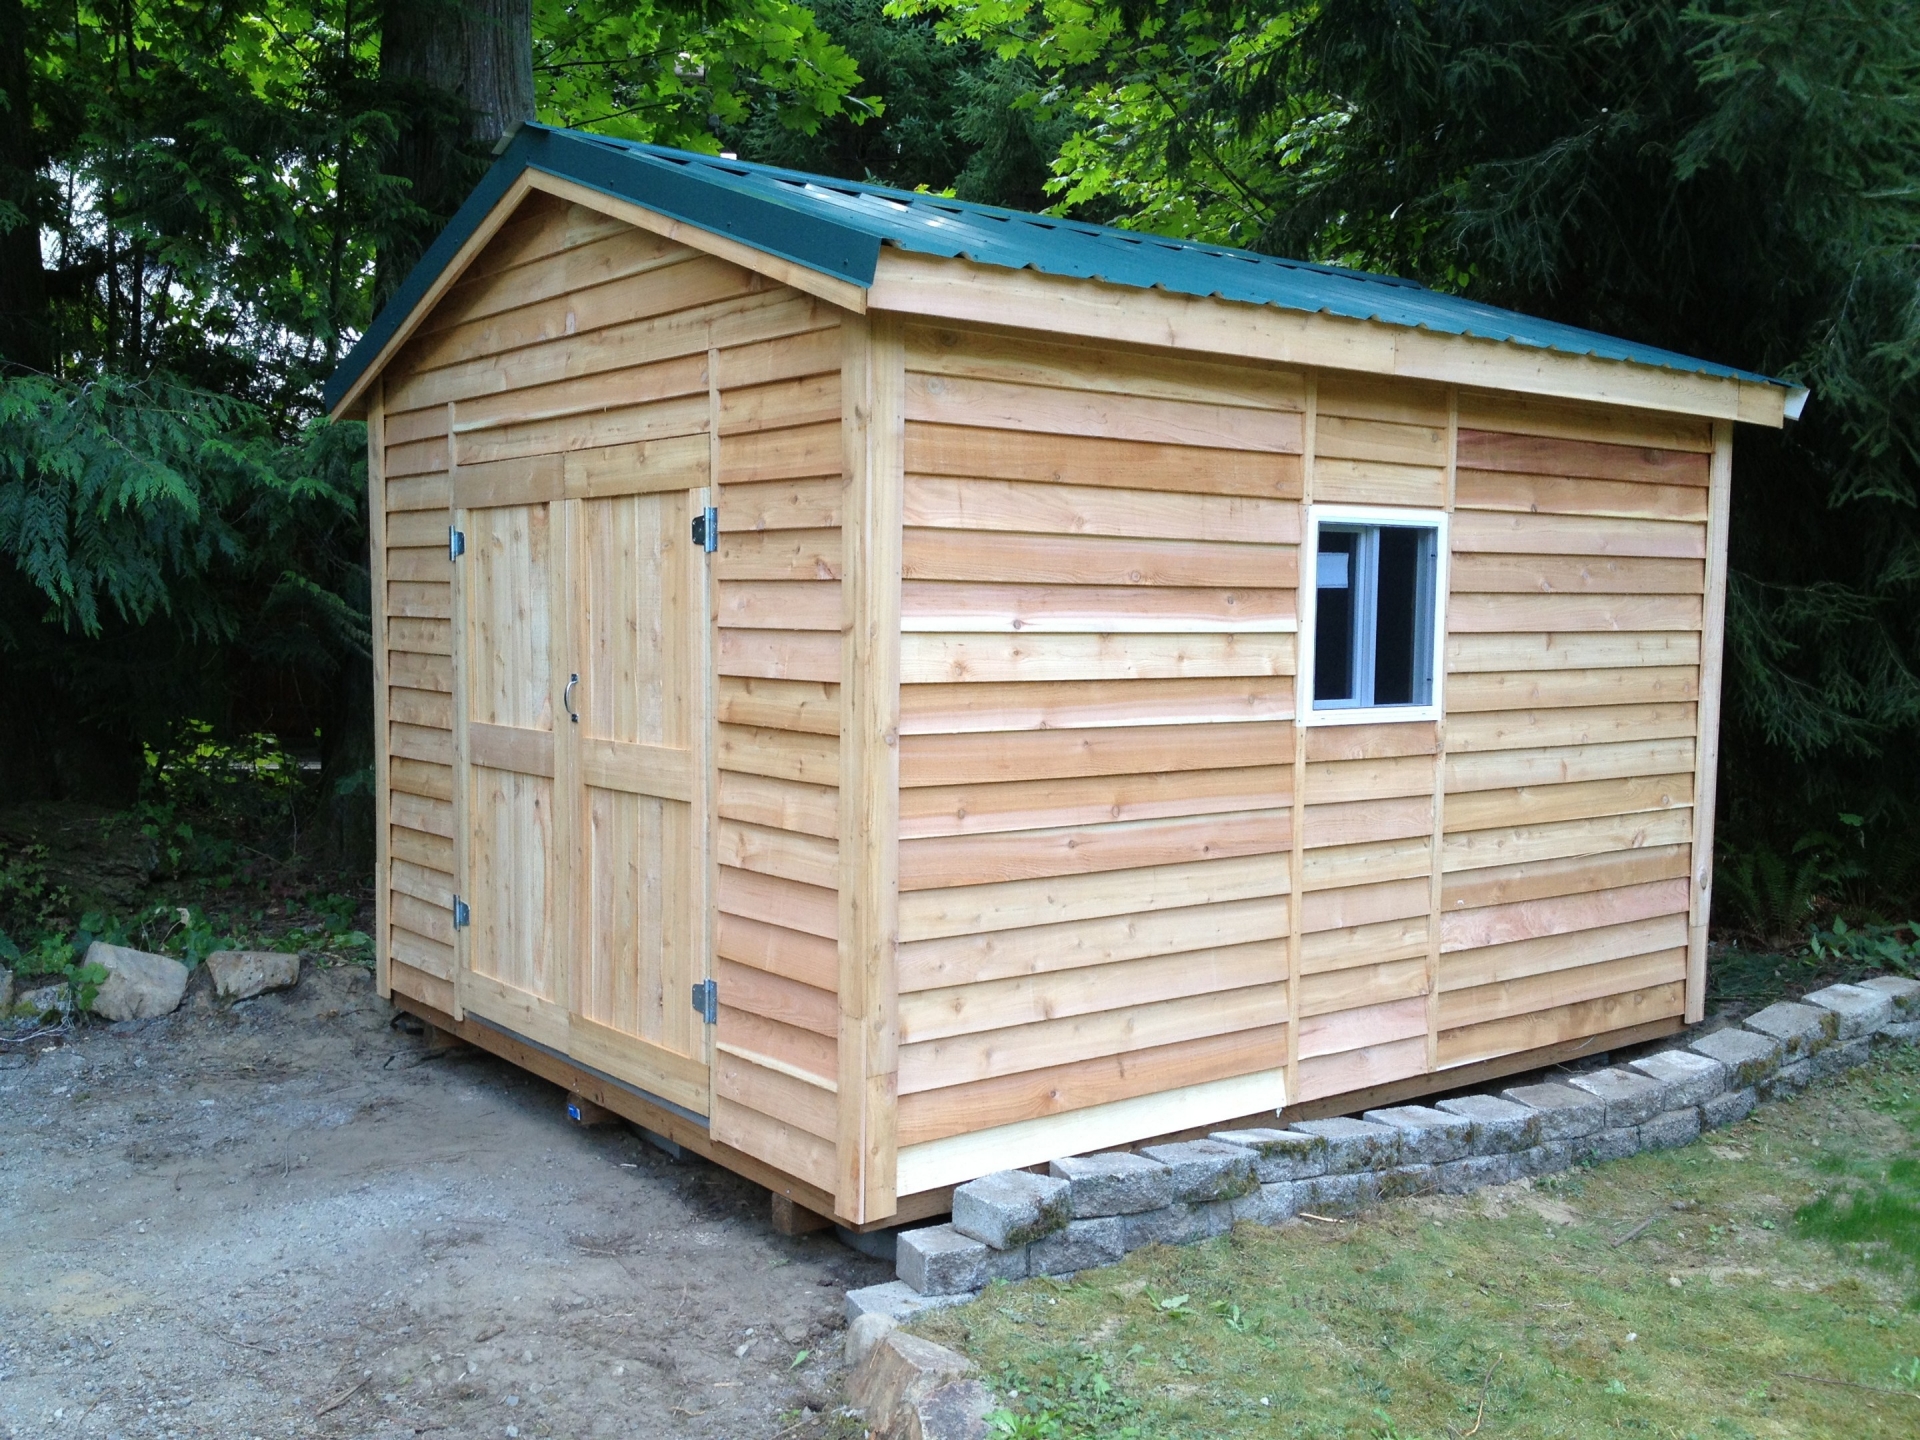
Alright, you're ready to finally tackle that shed project you've been dreaming about! You've got the tools, you've got the lumber, and you've got the ambitious spirit. But maybe you're feeling a little overwhelmed. Don't worry, friend! Building a 10x12 garden shed isn't as daunting as it might seem. Let's break it down into manageable steps, and I'll be right there with you every step of the way.
First things first, gather your materials. We're going to need:
Lumber: You'll need pressure-treated lumber for the foundation and bottom plate, and regular framing lumber for the walls, roof, and floor joists. Let's talk about amounts, because this varies depending on your design. For a simple shed with a gable roof, you'll need about 20 2x4s for the walls, 10 2x6s for the floor joists, 10 2x4s for the roof rafters, and a few more 2x4s for bracing and the roof sheathing. Don't forget your pressure-treated 2x4s for the base and bottom plate!
Plywood: You'll need a couple of sheets of plywood for the floor and roof sheathing.
Shingles: Choose the type you want, and make sure you get enough to cover the roof.
Doors and windows: Figure out where you want them and get the sizes you need.
Fasteners: You'll need screws, nails, and maybe even some lag bolts for connecting the heavier pieces.
Foundation materials: This depends on your chosen method. Concrete blocks and gravel are common options.
Next, choose your location. This is crucial! You want the shed to be level, have access to sunlight if you plan to grow things inside, and be close enough to your house for convenience. A good spot with drainage is important to avoid water damage.
Now, let's talk about that foundation! You have a couple of choices here:
Concrete blocks: This is a pretty standard method. You'll need to level the ground first, then lay down a layer of gravel for drainage. Then, you'll place the concrete blocks in a rectangle, making sure they're level and plumb.
Pressure-treated skids: This is a more DIY-friendly approach. You'll create a rectangular frame using pressure-treated 4x4s, then attach your floor joists directly to the skids. This option is easier to adjust for uneven ground.
Got your foundation sorted? Time for the framing!
Start with the floor joists: Attach your floor joists to the foundation with lag bolts. Make sure they're spaced 16 inches apart for a solid floor.
Build the wall frames: Cut your 2x4s to the correct length for the walls. Use nails or screws to build rectangular frames, making sure to attach bracing for extra strength.
Erect the walls: Carefully lift the wall frames onto the floor joists and secure them to the bottom plate. You'll need to make sure the walls are plumb and level.
Next up, the roof!
Build the roof rafters: Cut your 2x4s to the correct length for your chosen roof style. A gable roof is easiest for beginners. Make sure you have adequate overhang on the sides.
Attach the rafters to the walls: Use nails or screws to secure the rafters to the top plates of the walls. You'll want to make sure the rafters are spaced properly.
Add roof sheathing: Cover the rafters with sheets of plywood, starting at the bottom and working your way up. Make sure the sheets overlap for a good seal.
Now, let's get that roof covered!
Install the shingles: Starting at the bottom of the roof, use nails or roofing staples to secure the shingles. Follow the manufacturer's instructions for proper installation. Don't forget to add flashing around the chimney or any other openings.
Almost there! Time for the finishing touches.
Install the doors and windows: Cut openings in the walls for the doors and windows, and then attach them using screws or hinges.
Add siding: Choose a siding material that complements your home's style. You can use vinyl, wood, or even metal. Make sure you follow the manufacturer's instructions for proper installation.
Add trim: This will give your shed a more polished look. You can use wood trim around the doors, windows, and corners.
And voila! You have a beautiful, functional shed that you built yourself. Go ahead and celebrate your accomplishment!
A few final tips:
Use a level: Make sure every part of the shed is level, especially the walls and floor joists. This will make your shed stand straight and strong.
Use a stud finder: This will help you locate the studs in the walls, making it easier to hang shelves, mirrors, or other items.
Take your time: This is a big project, so don't rush it. Take your time, measure twice, and cut once.
Don't be afraid to ask for help: If you get stuck on something, don't be afraid to ask a friend or family member for help. There's no shame in asking for guidance!
Remember, building a shed is about the journey, not just the destination. Enjoy the process, and be proud of your accomplishment! And hey, if you find yourself stuck on a particular step, feel free to ask! I'm happy to help a fellow shed builder in need. Good luck!
Step-by-step guide to building a pole shed on a budget

Alright, let’s talk about building a pole shed! It’s a great way to add extra storage space to your property without breaking the bank. I’m going to walk you through the process, step by step, to show you how to build your own pole shed on a budget.
First things first â€" Let’s talk about the planning stage:
Get those blueprints: Before you even think about starting to dig, you need a plan. That means finding a blueprint or drawing one up yourself. If you’re not a professional, consider getting help from a draftsman or engineer. They can help you design a shed that’s both functional and structurally sound. You’ll need to check with your local building department about any permits you’ll need.
Choose a location: Think about where you want your shed, and what the sun exposure will be like. Also, consider where you’ll be able to get your materials delivered. Make sure it’s on level ground, and that you have access to utilities if you need them. Remember to keep a safe distance from any power lines or trees.
Gather your materials: Once you have your plan, you need to gather your materials. Shop around for the best prices, and don’t be afraid to negotiate with suppliers. I love checking out places like Home Depot or Lowe’s, but you can also find great deals at local lumberyards. You're gonna need lumber for the framing, roofing, and siding. Don't forget the concrete for your foundation and the steel poles.
Decide on your roof: The roof is a big part of your pole shed, so think about what kind of roof you want. A simple gable roof is easy to build and economical. A more complex hip roof can offer more stability, but might be more expensive. Don't forget about things like flashing, gutters, and downspouts.
Think about the siding: Do you want to go for a more traditional look with wood siding, or are you looking for something more modern like metal siding? The type of siding you choose will have a big impact on your budget and the overall aesthetic of your pole shed.
Now it’s time for the construction phase:
Get your foundation set: Start by digging the holes for your pole supports. You’ll need to use a post hole digger or rent an auger, which is a handy tool for digging large holes in the ground. The depth of your holes will depend on your local frost line, so be sure to check with your building department. Once the holes are dug, you’ll need to set your poles in concrete. Make sure they are perfectly plumb!
Framing is next: This is where the fun begins! Start by framing the floor. Use pressure-treated lumber for the floor joists, and attach them to the poles. Then frame the walls, and make sure they are properly braced. Use plywood or OSB for the sheathing, which will give you a solid base for your siding.
Roofing is crucial: Once the framing is complete, it’s time for the roof. Start by installing the roof trusses, which are the structural support for your roof. Then, attach the roofing sheathing, and make sure to use proper ventilation to prevent moisture buildup. Lastly, choose your roofing material and secure it to your roof.
Siding time! This is where you can add some personality to your pole shed. You can choose from a variety of siding materials, from wood to metal to vinyl. Make sure to install it properly, paying attention to any flashing and trim.
Don’t forget the doors and windows! You’ll need doors to access your shed, and windows for light and ventilation. Measure carefully and choose the size and type of doors and windows that best suit your needs.
Finishing touches: Once the siding is installed, add your finishing touches. You can paint or stain your pole shed, and add trim to give it a more polished look.
Throughout this whole process, you'll need to stay organized and safety-conscious. Have a plan for how you’ll store your tools and materials. Make sure you have enough light, and wear proper safety gear, especially when working with power tools. And don’t hesitate to ask for help if you need it.
Building a pole shed on a budget is achievable if you take it one step at a time. I'd recommend focusing on the basics, and adding extra features later if your budget allows. Remember, a pole shed doesn't have to be fancy to be functional. As long as it’s well-built and protects your belongings, it’s a good investment.
Here are some tips to help you stay on budget:
Shop around: Compare prices for materials from different suppliers. Don’t be afraid to bargain hunt!
Consider used materials: You can often find good deals on used lumber, roofing, and other materials. Just make sure they're in good condition.
Don't be afraid to DIY: You can save money by doing as much of the work yourself as possible. There are plenty of resources available online to help you with the process.
Think about your needs: You don't need to build a huge shed if you don't need all that space. Consider the size of your shed carefully, and choose a design that's both functional and affordable.
Building a pole shed can be a rewarding experience. Not only will you save money, but you’ll also have a sense of pride in knowing you built it yourself. Plus, it’s a great way to add value to your property.
Remember, your pole shed is a reflection of your hard work and ingenuity. So have fun with it!
8x12 shed plans that save you money but look great
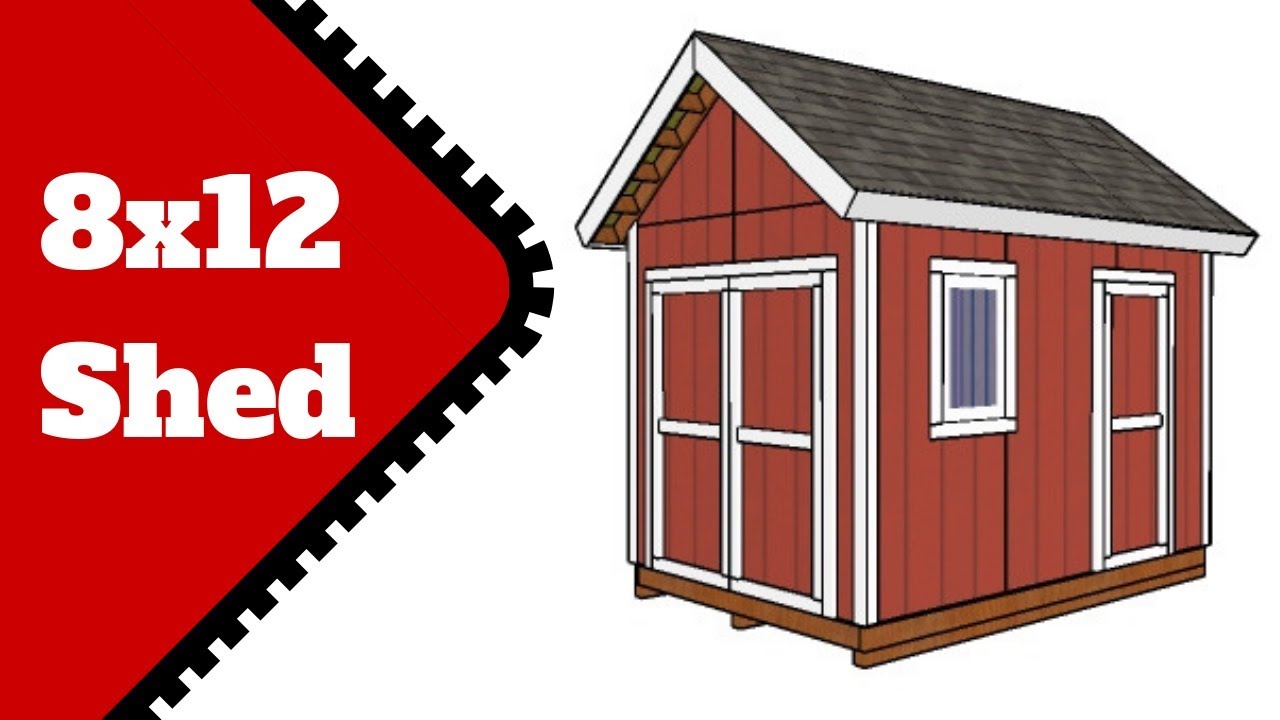
Hey there, shed enthusiasts! You've got the dream, the vision, the desire to have a beautiful, functional shed in your backyard. But let's be real, sometimes the cost of a shed can feel like a punch to the gut, right?
Don't worry, we're not going to let those high prices keep you from achieving your shed goals. We're talking about building a gorgeous 8x12 shed that looks fantastic AND fits your budget. It's totally possible, and we're going to walk you through it, step by step, in this friendly guide.
Let's Talk Cost-Saving Strategies
The key to a budget-friendly shed is smart planning and strategic choices. Here's the lowdown:
DIY is Your Best Friend: Building your own shed is the most significant way to save money. You're essentially cutting out the cost of labor, and that's a HUGE chunk of the price tag.
Simple is Beautiful: Don't go overboard with fancy designs. A classic shed with a gable roof and a simple door is just as charming and way more affordable.
Material Magic: Explore different materials and their cost-effectiveness. We'll talk about this in more detail later.
Pre-Cut Lumber: This is a game-changer! Having the wood pre-cut to your exact specifications saves you time and eliminates potential mistakes.
Choosing the Right Materials: Finding the Sweet Spot
Here's where things get fun (and maybe a little bit technical):
Foundation: Think about your budget and soil conditions. A concrete foundation is the most durable, but it's also the priciest. You can save money with a gravel pad or a well-constructed wooden foundation.
Framing: Pressure-treated lumber is essential for the bottom plates and anything in direct contact with the ground. For the rest of the framing, you can use standard framing lumber.
Siding: You have tons of options here! Vinyl siding is affordable and low-maintenance, but it might not be the most aesthetically pleasing. Cedar siding is beautiful and long-lasting but can be a little pricey. Think about what matches your style and budget.
Roofing: Asphalt shingles are the workhorse of roofing and are very budget-friendly. Metal roofing is also a good option, especially if you're concerned about longevity.
Let's Get Practical: Building Your Shed Step by Step
Now for the fun part! You'll need some basic tools: a circular saw, a drill, a tape measure, a level, a hammer, and maybe a nail gun.
Step 1: The Foundation
Plan and Prep: Decide on your foundation type and mark out the exact dimensions of your shed.
Foundation Construction: Follow the specific instructions for your chosen foundation type. Ensure it's level and strong.
Step 2: The Framing
Building the Floor: Start with the bottom plates, making sure they're level. Construct the joists, running perpendicular to the plates. Don't forget to add subfloor planks.
Wall Framing: Build the walls using studs and top plates. Ensure your wall sections are square and plumb before attaching them to the floor.
Roof Framing: Construct the rafters and install them onto the top plates. Connect them to the ridge board to form the roof structure.
Step 3: Siding and Roofing
Siding Installation: Start from the bottom and work your way up. Cut the siding to fit and attach it securely to the wall framing.
Roofing Installation: First, install a felt underlayment for added protection. Then, shingle your roof, starting from the bottom and working your way up.
Step 4: Doors and Windows
Door and Window Placement: Decide where you want your door and windows and mark their positions on the walls.
Installation: Cut the openings and install your doors and windows using the appropriate hardware.
Step 5: Finishing Touches
Trim and Molding: Add trim around the doors, windows, and roofline for a polished look.
Paint or Stain: This is where you can really make your shed shine. Choose colors and finishes that match your style and complement your home.
Interior Work: Consider adding shelves, hooks, or other organizational features inside your shed.
Bonus Tips for Budget-Friendly Beauty
Second-Hand Supplies: Check out local salvage yards and thrift stores for doors, windows, and other materials at discounted prices.
Ask for Help: Don't be afraid to ask for help from friends or family. They might have the tools or skills you need!
Don't Be Afraid to Experiment: Get creative with your design and add personal touches that make your shed unique.
So, there you have it! You're now armed with the knowledge to build a beautiful, functional 8x12 shed that fits your budget. Remember, it's about taking your time, planning wisely, and enjoying the process. Building your own shed is a rewarding experience, and the end result will be something you can be truly proud of.
Diy 10x12 shed plans: tips for affordable construction
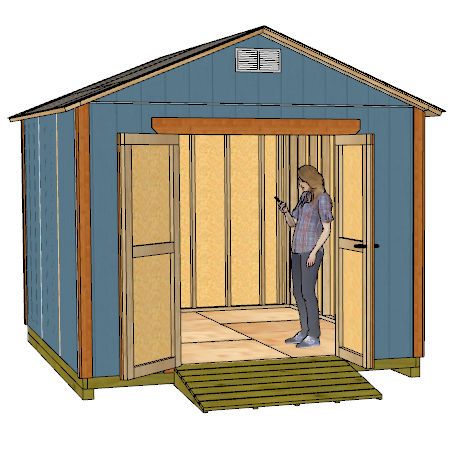
So, you're thinking about building your own shed! Awesome! A 10x12 shed is a great size for a workshop, storage space, or even a cozy little hangout. You’re going to be saving money and having a blast, but it's also important to be smart about it. That’s why we’re going to dive deep into how to build your 10x12 shed on a budget without sacrificing quality.
1. The Plan is the Key (and a Money Saver):
First things first, you need a plan. That doesn't necessarily mean hiring an architect, but at least having a solid idea of what you want to build. A simple sketch on graph paper with measurements can be a great start.
Pro Tip: Online resources like Pinterest and YouTube offer free shed plans, or you can find affordable plan sets from reputable companies.
2. Materials: The Hunt for Savings
You might be surprised by how much you can save by being resourceful.
A. Used Lumber:
Local Lumber Yards: Most lumber yards have used lumber, sometimes called "rejects," that's often a fraction of the price of new. Check for straight boards without major cracks or knots.
Craigslist and Facebook Marketplace: These are great for finding deals on used lumber and even building materials, but be sure to inspect everything carefully before buying.
B. Reclaimed Materials:
Demolition Sites: See if you can get your hands on reclaimed wood from old barns, houses, or sheds. Just make sure it’s treated and free of rot.
Salvage Yards: These can be treasure troves of building materials, often at significant discounts.
C. Smart Choices:
Pressure-Treated Lumber: While it's pricier, it's essential for the foundation and floor joists to resist moisture and rot.
Standard Sizes: Stick with standard sizes for plywood and lumber to avoid having to buy extra to make up for odd cuts.
3. Foundation: Building a Solid Base on a Budget:
The foundation is the most important part of your shed. It keeps it level, stable, and prevents rot.
A. Concrete Foundation:
DIY Concrete: Mixing your own concrete can save you money, but it’s a bit more labor-intensive.
Ready-Mix Concrete: While slightly more expensive, ready-mix is convenient and ensures a uniform mix.
B. Concrete Blocks:
Stacked Block Foundation: This is a relatively affordable option, especially if you can find used blocks.
Concrete Block Walls: For added durability, you can even use concrete blocks to build the shed's foundation walls.
C. Poured Concrete Slab:
Simplest Option: A poured concrete slab is a great option for a shed, but it requires more labor and can be pricier.
4. Framing: The Bones of Your Shed
The framing of your shed is the skeleton that supports the roof and walls.
A. Framing Lumber:
Pressure-Treated Floor Joists: Use pressure-treated lumber for your floor joists to prevent rot.
Standard 2x4s for Walls and Roof: Opt for standard 2x4s for the wall and roof framing.
B. Roof Truss or Rafters:
Trusses: These are pre-built and provide strength, saving you time and potential errors.
Rafters: Building your own rafters requires more knowledge and precision, but it can be more economical.
5. Siding and Roofing: The Shed's Outer Layer
The siding and roofing are what protect your shed from the elements.
A. Siding:
Vinyl Siding: It's affordable, low maintenance, and comes in a wide range of colors.
Wood Siding: Wood siding is a classic look, but it requires more maintenance.
Metal Siding: Metal siding is durable and fire-resistant, but it can be more expensive.
B. Roofing:
Asphalt Shingles: These are the most common and affordable option.
Metal Roofing: Metal roofing is durable and long-lasting, but it can be more expensive.
6. Doors and Windows: Completing the Look
Standard Doors: Use standard-size doors to save money. You can often find affordable doors at home improvement stores.
Single Windows: Opt for single-pane windows for a more budget-friendly approach.
7. Interior Finish: Personalizing Your Shed
Drywall: Drywall is a popular and affordable interior finish.
Painted Plywood: You can use plywood panels as a budget-friendly alternative to drywall and paint them to create a finished look.
Wood Paneling: Wood paneling adds warmth and character to your shed.
8. Don't Forget the Extras:
Electrical Wiring: If you plan to use electricity in your shed, budget for wiring and a breaker box.
Insulation: Insulating your shed can help keep it cooler in the summer and warmer in the winter.
Flooring: Add a layer of plywood subfloor and then choose flooring that fits your budget and needs.
9. DIY vs. Hiring Out:
DIY is Best for Savings: Building your shed yourself is the most cost-effective way to go.
Hiring Out for Specific Tasks: If you're not comfortable with certain tasks, such as pouring concrete or installing the roof, consider hiring a professional.
10. Safety First:
Power Tools: Use safety goggles, gloves, and ear protection when working with power tools.
Heavy Lifting: Get help with heavy lifting tasks.
Building Codes: Check local building codes and obtain any necessary permits before starting your project.
Final Thoughts:
Building your own 10x12 shed is a rewarding experience that can save you a lot of money. With a little planning, resourcefulness, and a DIY spirit, you can create a functional and stylish shed that you’ll enjoy for years to come. Remember, it’s about the process, not just the end result. So, grab your tools, put on your safety glasses, and get ready for a fun and fulfilling construction project!
How to build a 8x10 shed that’s both cheap and durable
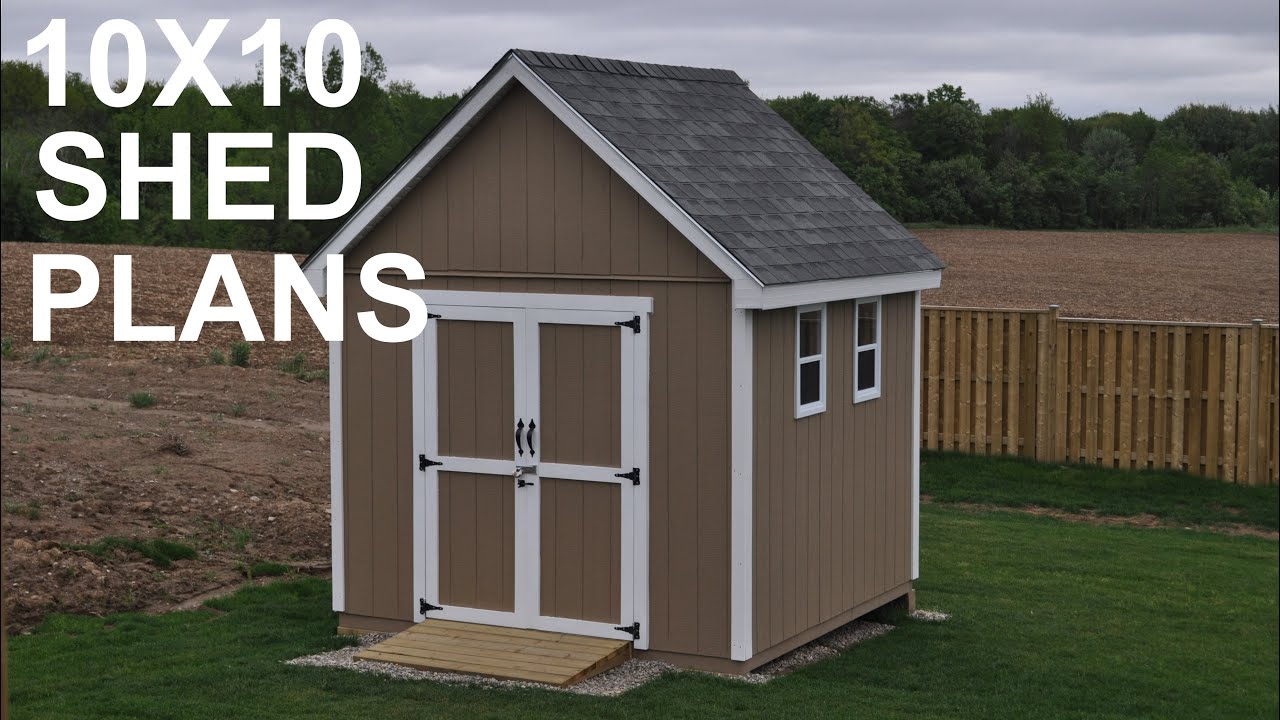
Alright, you want to build an 8x10 shed, and you're looking for a combo of cheap and durable, huh? That's a great goal! You can definitely do it, and I'm here to walk you through the whole process.
Let's Start With The Basics
First off, let's talk about the basics. An 8x10 shed is a great size for all sorts of things â€" storing tools, gardening equipment, bikes, you name it! You'll want to decide on the shed's height. A standard height is around 8 feet, but if you're tall or need extra space, you can go for 9 or even 10 feet. Just remember, the higher you go, the more materials you'll need, so factor that into your budget.
Choose Your Foundation
Now, for the foundation. There are a few options here, each with its own pros and cons.
Concrete: This is the most durable option, but it's also the most expensive. You'll need to pour a concrete slab, which can be a lot of work. You'll need to dig down a few inches for the footing, then pour the concrete and level it out.
Concrete Blocks: This is a good compromise between cost and durability. You can lay concrete blocks to create a base for your shed. You'll need to make sure the blocks are level and secure, but it's less work than pouring concrete.
Pressure Treated Lumber: This is the cheapest option, but it's not as durable as concrete or concrete blocks. You can create a frame out of pressure-treated lumber and set your shed on top of that. Make sure you use enough lumber to support the weight of your shed.
Let's Talk Lumber
Now, for the lumber. You'll need a lot of it, so let's talk about your choices:
Pressure-treated lumber: This is your best bet for the floor joists, sill plates, and anything that will be in contact with the ground. It's resistant to rot and bugs, so it'll last a long time.
Standard framing lumber: This is what you'll use for the walls, roof, and other parts of the structure. It's cheaper than pressure-treated lumber, but you'll need to protect it from the elements.
Plywood: You'll need plywood for the floor, walls, and roof sheathing. You can choose between standard plywood or OSB (oriented strand board), which is less expensive but not as strong.
Roofing: For the roof, you'll need roofing shingles. There are lots of different types to choose from, so do your research and pick one that fits your budget and style.
Get The Tools You Need
Before you get started, you'll need to gather some tools. You'll need a saw (a circular saw is best for this kind of project), a drill, a hammer, a level, a tape measure, and a nail gun. You'll also need safety gear, including safety glasses, gloves, and hearing protection.
Step by Step: Building Your Shed
Okay, let's get down to building! Here's a step-by-step guide to help you along the way:
1. Prepare the Foundation:
- If you're using concrete, pour the slab and let it cure properly.
- If you're using concrete blocks, lay the blocks and make sure they are level.
- If you're using pressure-treated lumber, build a frame and make sure it's square and level.
2. Build the Floor:
- Cut the floor joists to size and install them onto the sill plates, which sit on your foundation.
- Make sure they're spaced evenly and use a level to make sure they're straight.
- Attach plywood to the floor joists, creating your floor.
3. Build the Walls:
- Cut the wall studs to size and attach them to the bottom plate.
- Use a level to make sure they're straight and plumb (perfectly vertical).
- Use plywood to sheathe the walls.
4. Build the Roof:
- Cut the rafters to size and attach them to the top plate of the walls.
- Use plywood to sheathe the roof.
- Install your chosen roofing material, following the manufacturer's instructions.
5. Install the Doors and Windows:
- Cut the openings for your doors and windows, making sure they're the right size.
- Install the doors and windows, following the manufacturer's instructions.
6. Finishing Touches:
- Add trim around the doors and windows, making sure it's even and straight.
- Paint or stain the shed, if you wish, to give it a finished look.
Tips for Saving Money
Now, let's talk about saving money. Here are some tips for building a shed on a budget:
Recycle: Check out local recycling centers and salvage yards. You might be able to find some good-quality used lumber at a fraction of the price of new lumber.
Go with Basic Materials: Don't overspend on fancy materials. Standard framing lumber and plywood are all you really need.
Buy in Bulk: If you can, buy your lumber in bulk to get a discount.
Do it Yourself: This is the biggest money saver of all! Hiring someone to build your shed can cost a lot of money. But if you're willing to put in the time and effort, you can save a lot of money by doing it yourself.
Safety First
Safety is crucial when building a shed. Always wear safety glasses, gloves, and hearing protection. Be careful with power tools and avoid lifting heavy objects without help. If you're not comfortable working with power tools, ask a friend or family member for help.
Enjoy Your New Shed
Building your own shed is a great project that can be both rewarding and fun. With a little planning and effort, you can build a cheap and durable shed that will last for years to come. Just remember to take your time, follow the instructions carefully, and most importantly, have fun!
The benefits of pre-designed storage shed plans

Let's be real â€" building a storage shed is a big deal. It's not just about chucking some plywood together and calling it a day. You're talking about a structure that's going to be part of your property for years to come, holding all your precious (and not-so-precious) belongings. And let's face it, most of us don't have the time, skills, or maybe even the inclination to tackle a project that big from scratch.
Enter: pre-designed storage shed plans. Think of them as the ultimate shortcut to shed happiness. They're basically blueprints that take the guesswork out of building a storage shed, saving you a ton of time, money, and (let's be honest) stress.
But what makes these plans so darn awesome? Let's break it down:
1. Time is Money (and Your Time is Precious!)
We all know the saying: "Time is money." But seriously, how much time do you actually have to spend designing, re-designing, and trying to figure out how to build a shed from the ground up? Pre-designed plans cut out all that time-consuming fuss, putting you on a fast track to a finished shed. Imagine â€" you could be throwing a party in your new shed sooner than you think!
2. No More "Uh Oh, I Forgot..." Moments
Ever start a project and then realize you're missing a crucial piece of the puzzle? Pre-designed plans take the "I forgot!" out of the equation. They provide a detailed list of everything you need, from lumber to hardware to roofing materials. No more frantic trips to the hardware store at 9 pm, just to find out you're missing a vital component.
3. Avoid the "I Didn't Think About That" Pitfalls
Building a shed from scratch can be like a game of Tetris. You might think you've got it figured out, but then you realize you've forgotten about things like ventilation, drainage, or even the proper door placement. Pre-designed plans address all those potential headaches, ensuring your shed is built to last and function well.
4. You Don't Need to Be a Master Builder
Okay, maybe you're not a seasoned carpenter. But don't let that stop you from building your dream shed! Pre-designed plans come with clear and easy-to-follow instructions, making the construction process more manageable, even for DIY beginners. Plus, many plans include detailed diagrams, sketches, and even video tutorials to help you along the way.
5. Save Money in the Long Run
You might be thinking, "But pre-designed plans cost money!" True, but they can actually save you money in the long run. Think of it like this: buying pre-designed plans is like investing in a professional shed builder. You're paying for expertise, guidance, and a proven design that minimizes potential errors and costly mistakes.
6. Variety is the Spice of Life (and Sheds!)
No two storage sheds are created equal. And with pre-designed plans, you have a ton of options to choose from. Looking for a classic barn-style shed? Want something modern and sleek? Perhaps you need a shed with a loft for extra storage space? There's a plan out there for everyone!
7. Get Inspired!
Sometimes you need a little inspiration to get your shed dreams rolling. Pre-designed plans can act like a springboard for your imagination, showing you all the possibilities and helping you visualize the perfect shed for your needs.
8. Ditch the Design Drama
Let's be honest, design can be stressful. Trying to choose the right dimensions, the perfect roofline, and the ideal placement can feel like a major decision. With pre-designed plans, you're free to focus on the fun part â€" building your shed!
9. Customize to Your Heart's Content
While pre-designed plans give you a solid foundation, you're not limited to them. You can always make tweaks and adjustments to personalize the design. Maybe you want to add a window or a side door. No problem! The beauty of pre-designed plans is that they offer flexibility without the pressure of starting from scratch.
10. Peace of Mind Guaranteed
Building a storage shed is a big commitment, but pre-designed plans provide a sense of security and confidence. You know you're working with a proven design that's been tested and refined. You can trust the plans to guide you every step of the way, giving you peace of mind and a shed that's built to last.
So, are you ready to say goodbye to the DIY shed stress and hello to your very own storage haven? Pre-designed plans are your secret weapon to building the shed of your dreams â€" without the headaches.
